Pages

The Bluffer's Guide to Food - a review.

The other day I received a little book through the post – “The Bluffers Guide to Food” so sat myself down with some coffee and homemade cookies (I had to get through them!)  and got stuck in.


The premise of the Bluffers Guides is, of course, just as it says – how to look like you know what you’re talking about when you don’t! This guide was written by Neil Davey, he of The Lambshank Redemption (great name for a blog!) which I have followed for some time. 

At the very start of the book, Mr Davey tackles the use of the word" foodie" which, for some inexplicable reason, is now a no-no and there seem to be several other words that are also not acceptable, if you want to impress when talking about food; “passionate” for instance.  

I have been a passionate foodie for well over 30 years because I love cooking, eating, creating meals, writing about food, thinking about and talking about FOOD but in that time the food world has changed radically. For instance conversation with a stranger in the 80s might go like this …

Stranger   “What do you do?”
Me   “I’m a chef”
Stranger “Oh yeah, I’m a ... (name a job)

Same conversation now

Stranger   “What do you do?”
Me   “I’m a chef”
Stranger   “Oh Wow, that’s like amazing blah, blah de blah blah blah”

The job hasn't changed (not really, deep down, we might have a few different ingredients to play with but it’s still long, hot hours and hard work) but the perception really has and, seemingly, this is true of all aspects of matter.

So, back to the book, there are 12 Chapters …


In the glossary I was pleased to discover that tap water, in France, is called “eau de robinet” which sounds like just the sort of thing I might enjoy!

The book contains lots of interesting snippets of info, much of which I already knew, and lots of opinions many of which I share and have even already expounded on but then I am a foodie, I mean ”food worshipper” (the correct term at present).  

In “Shopping Around” which is in part about best before dates he makes many of the same points (eg. abut cheese already being preserved) as I do in my rant on the matter at the end of Creative Ways to Use Up Leftovers and I’m always telling Americans that they didn’t invent apple pie and English people that potatoes are foreign “muck”!

The Bluffer’s Guide to FOOD is a quick read which I enjoyed but more in an “oh yes, I agree with that” way than, perhaps the way the book was intended.  If, however, you would like to pick up some interesting info about food, cooking, eating and learn how to sound erudite when talking about it, plus maybe be guided into looking deeper into some matters (there is a chapter on useful books) then go for it, it's available from Amazon and here are the relevant details,

Paperback: 128 pages
Publisher: Bluffer's; New edition (1 April 2014)
Language: English
ISBN-10: 1909937126
ISBN-13: 978-1909937123
Product Dimensions: 16cm x 11cm x 1cm

If you are unsure if you need this book find out here!

The Bluffer’s Guide to Food Quiz

This is one of quite an extensive series covering everything from dogs to the quantum universe via wine, sex and chocolate – all the good stuff! 

In other news …

~   Slightly related to the above, the bit about shopping, I am still finishing off a carton of whipping cream which we bought for 16p on 3rd April as that was its “best before date”.  Yesterday, 16th April, I finished it off to make an Alfredo sauce as part of my Finnan Crispy Pizza!
~   Similarly my 10 days out of date red cabbage is absolutely fine and yummy in coleslaw and I can’t see it going off any time soon!


Please Click Here to Tweet this post - thank you!


Finnan Crispy Pizza! ~ and a lovely easy pizza dough recipe.

Last night's dinner was inspired by a joke my real man made.  I was pondering on making a fish pizza, thinking about using smoked haddock and he said …

I suppose it would be a finnan crispy!” ~ get it?

Well that made me determined to make one so that I could share this bon mot with the world. 

smoked haddock pizza with beetroot strands


Firstly I don’t know if I've posted my simple pizza dough recipe before but either way, here it is now …

Never trust a round pizza quote from Todd English


My Simple Pizza Dough

Makes 2 x 30cm pizzas. 


I say this recipe makes 2 x 30cm pizzas but that is just a guideline. The beauty of making your own dough is you can choose to have a crisp thin base (I roll mine so thin there are crunchy bubbles in the crust once cooked) a thicker more substantial base (for real men!) or even a deep dish pizza with a ridge around the edge to hold more filling. For us this recipe makes one thin and crispy about 10cm across and one enormous thicker based pizza. Neither of them are round! 


225ml warm water
1 tsp sugar
1 pkt easy dried yeast
1 tbsp olive oil
approx 325g plain flour
scant ½ tsp salt
a little more olive oil
a handful of flour - wholemeal if possible

~   Stir together in a large bowl (or mixer bowl) the water and the sugar till the sugar has dissolved.
~   Sprinkle over the yeast and set aside in a draught free place for 10 minutes or so till it has started eating the sugar and become bubbly.
~   Stir (or slowly mix in with the mixer) the olive oil, salt and flour into the yeast mixture, to make a sticky but workable dough.
~   Add more flour if necessary until you have a soft dough then knead (or continue running the mixer) for a few minutes.
~   Lightly oil a fresh bowl, form the dough into a soft ball and put it into the greased bowl, turn the dough to coat with oil, cover loosely with a clean cloth or put a clean plastic bag over it and stand in a warm place until the dough has doubled in size. This takes about an hour and you don’t have to sit with it, you can do what you like while it is rising.
~   Preheat the oven to 425ºF/220ºC/200ºC fan/gas 7.
~   Prepare two baking sheets by sprinkling with wholemeal flour (or normal if you haven’t got any) and then shaking to coat evenly.
~   Knock the dough back and knead in the oil clinging to it.
~   Divide into two and roll or push into shape on the baking trays.
~   Top with whatever you have planned.
~   Bake at till crisp and golden and wonderful.

Finnan Crispy Pizza


I had a piece of cooked smoked haddock leftover from making kedgeree the day before and this is just a loose description of what I did because, of course, it was just for me (a bit too fancy for my darling – he had minced beef AND sausages on his) and I made it up as I went along, so …

~   Half a leek thinly sliced and cooked very gently in butter, covered by a butter wrapper and then a lid, till super tender.
~   Added about 60ml (13 days out of date but utterly perfectly OK) cream and a good grating of Gran Padano and simmer till thick.
~   Cooled this sauce.
~   Assembled my pizza and because I didn’t want to overcook the cooked fish I par-baked my base before adding the topping.
~   Spread the party cooked base with the cooled leek sauce, sprinkle with flaked leftover smoked haddock, sprinkled with freshly grated Gran Padano and finished baking.
~   Prettied it up with a bit of beetroot salad.
~   Took the above photo.
~   Poured a glass of white wine and had dinner.

Pizza, whether you make the base yourself or buy it in, is a great vehicle for all sorts of leftovers and a great opportunity to get creative. Here are some random pizzas I made in the past …

apple, cheddar and chorizo pizza

 Roasted Windfall, Chorizo and Cheddar Pizza


blue cheese pizza with red grapes

Blue Cheese & Grapes Pizza


New potato and spring onion pizza

Leftover cooked New Potato Pizza with Spring Onions


hame and pease pudding pizza

Ham and Pease Pud Pizza

  
My real man is a Geordie lad so ham and pease pud is a standard in our house – see here for how to make this easy, cheap and delicious staple.

So, as you can see,  a pizza doesn't have to have a tomato sauce spread on it, any appropriate goo will do! Nor is cheese de rigueur, I didn't use any with the pease pudding pizza. In short, any complementary collection of leftovers can be spread or scatted on a pizza base to make a delicious new meal, so go for it!


Speaking of leftovers ...


I'd just like to mention that my book of delicious ideas for making the most of leftover is now in its second edition.  Originally called The Leftovers Handbook the new editions is Creative Ways to Use Up Leftovers.


indispensable leftovers cookbook


Incidentally  my simple pizza dough also makes a very acceptable bread! 

Having made myself a single pizza (real man not in the mood) I had half the dough left so I mixed in some leftover caramelised red onions, formed it into a rustic  loaf shape , allowed to rise again and baked at 400ºF/200ºC/180C fan/gas 6 till it was golden and sounded hollow if whopped on the bottom.


caramelised red onion bread made from leftover pizza dough


Super Flexible Cookie Recipe

I received some great Seed & Bean Chocolate in the post the other day which I initially decided to just eat and eat and eat but then thought it might be a good idea to test some in the cooking department so I made cookies. 

I had three different flavours of chocolate to test.  I didn't want to use too much of it for this experiment so divided the dough into 6 and flavoured them thus …

1.  Dark Chocolate with Chilli & Lime
2.  Milk Chocolate with Cornish Sea Salt & Lime
3.  Lemon Poppy Seed White Chocolate
4.  Granola
5.  Salted Roasted Nuts
6.  Rum & “Raisin”

Look …
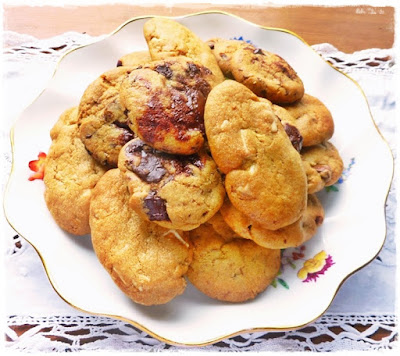
plate of homemade cookies


Key Cookie Recipe …


120g soft butter
100g caster sugar
50g light brown sugar
1 egg
½ tsp real vanilla extract
240g plain flour
pinch of salt
½ tsp bicarbonate of soda
about 180g of chosen mix-ins

~   Cream together the butter and sugars.
~   Beat the egg together with vanilla extract.
~   Sift together the flour, bicarbonate of soda and salt.
~   Gradually whisk in the egg (and here’s a handy hint – add a tablespoon of flour at the same time and the mixture is less likely to curdle).
~   Gradually stir in the flour mixture together with chosen additions to make a stiff-ish dough.
~   Now here’s a great thing about this dough … put it in the fridge overnight at least and in theory up to 72 hours. I’m afraid I couldn’t wait that long, I was brave and strong and waited about 36 hours.
~   Preheat the oven to 350°F/180ºC/160ºC fan/gas 4.
~   Divide the dough into walnut sized balls (or bigger for bigger cookies, or sticks for long cookies) and place not too close together on baking sheets.
~   Squash them a bit!
~   Bake till golden and puffed but still a bit squidgy to the touch.
~   Cool on a rack.

homemade cookies cooling on rack
  

This  made 22  variously sized soft cookies with crispy edges. I have personally tested one of each and they all worked well …

~   The Dark Chocolate and Chill was fabulous, of course. The Cornish Sea Salt and Lime was good too but then chilli is always the go for me! 


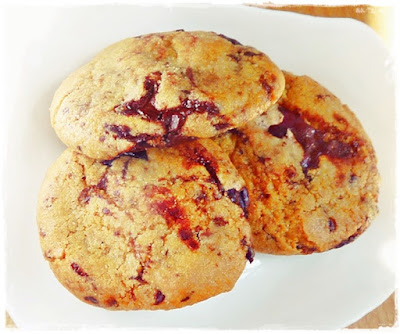
chocolate chip cookies


~   Next time I make the Lemon Poppy Seed White Chocolate cookies I think I’ll add a little lemon zest to continue the theme.
coffee and a cookie


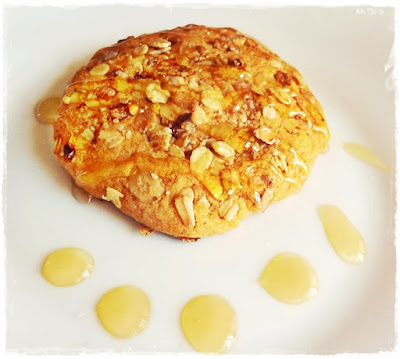
 ~  The granola cookie made a fine breakfast drizzled with a little honey. Next time I shall try replacing a tablespoon of sugar with honey when making the dough.
honey drizzled granola cookie for breakfaste


 ~  The salted nuts needed more nuts, or at least not both of them in the same place!, and more salt. I think next time I’ll sprinkle with a little crunchy sea salt before baking.

whole nut cookie


 ~  The rum and raisin-ish cookie I made with rum soaked dried fruits, (you'll have to scroll down a bit but it's worth it!) was soft, cakey and pleasantly boozy.

homemade cookies pinterest image
Don't forget it - pin it!

Other cookie additions that spring to mind …


~   A knob or two of stem ginger, coarsely chopped – this would be good either instead of or as well as dark chocolate chips.
~   Dried fruits that have not been macerated in alcohol, as opposed to the ones above, dried cranberries and orange zest would be a nice combination.
~   Coarsely chopped toffee or fudge.
~   A spoonful of ground coffee – also good with chocolate chips.
~   Toasted almonds with a drip or two of almond essence.
~   Toasted coconut.
~   Ground cinnamon.
~   Different essences and extracts – peppermint for instance, again with chocky.

Experiment – I did!

I do love a basic recipe, me!  If you have several of these in your brain, or other handy place, then you are really ready to cook – I've written a few books in a series I have called my Genius Recipes Series.  


Courageous Chocolate! (in time for Easter)

“Researchers have discovered that chocolate produces some of the same reactions in the brain as marijuana. The researchers also discovered other similarities between the two but can't remember what they are.”
Matt Lauer

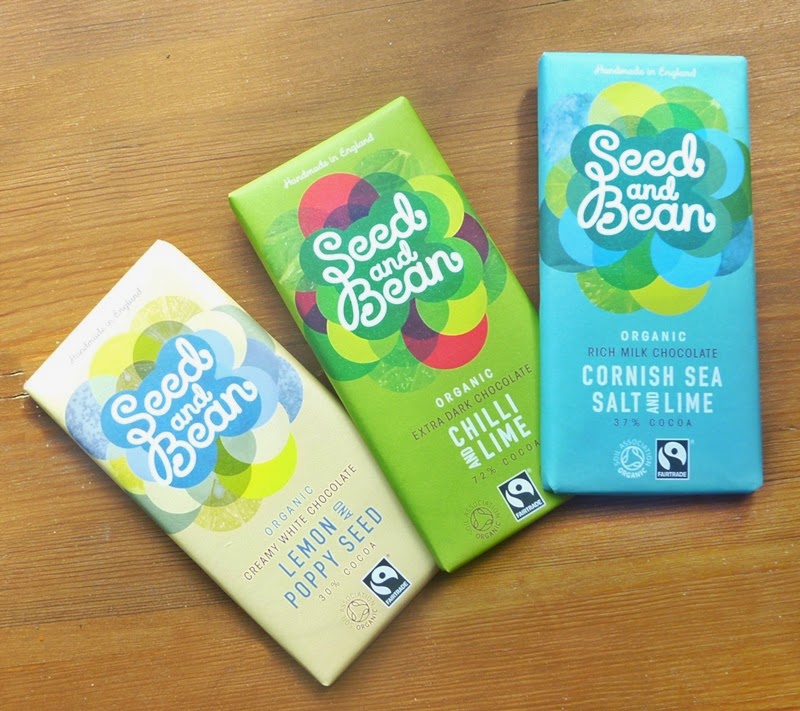
Last week I was lucky enough to receive 3 bars of Seed and Bean chocolate in the post!  Oh happy days.


It was difficult not to scarf the whole lot down, especially the white choc – for some reasons milk and white chocolate seem to have a kind of quenching effect for me, like drinking something refreshing when thirstily I just want to keep going. 

These seed and bean chaps take their chocolate making very, very seriously so I treated it with the utmost respect and tried each of the chocolate thoughtfully and with respect. Here are my findings.

Extra Dark Chocolate ~ Chilli & Lime

The first thing I noticed was that lovely snap that really good dark chocky has when you break it. The hit of chilli is quite strong, which suits me just fine! The lime was less obvious but the overall effect delicious.

Rich Milk Chocolate ~ Cornish Sea Salt & Lime  

Well I’m bound to be a bit biased here as Cornwall is my home! Salty chocolate is a wonderful thing especially when you bite on a grain of salt as is the case here. I was a little dubious about the lime but it works so well I can't stop eating it!

Creamy White Chocolate ~ Lemon & Poppy Seed

The lemon flavour is a mild but perfect complement to the rich creaminess of the excellent white choc and the poppy seeds are very much in evidence. 

I was loathe to do anything with this yummy chocolate other than eat it but at the same time felt I should give it a thorough testing so decided to make some chocolate chip cooking and then eat them.  It’s a hard life being a food writer.  I used my very flexible cookie recipe – see here for details – and all three chocolate performed excellently.


I also think that the Chilli & Lime Chocolate is an ideal candidate for a chocolate quesadilla!


Seed & Bean Chocolate is rather special in more ways than just delicious.

Exciting:


Just look at that!  Here is a list of the flavours in case you can’t quite read them!

Cornish Sea Salt Extra Dark
Coconut & Raspberry Extra Dark
Pumpkin Seeds and Hemp Oil Extra Dark
Extra Dark
Lemon & Poppy Seeds Creamy White
Rich Milk
Tangerine Rich Milk
Lavender Extra Dark
Chilli & Lime Extra Dark
Mandarin & Ginger Extra Dark
Mint Extra Dark
Coffee Espresso Fine Dark
Lemon & Cardamom Fine Dark
Hazelnut & Almond Milk
Just Ginger Fine Dark
Sicilian Hazelnut Fine Dark
Cornish Sea Salt & Lime Rich Milk
Raspberry & Vanilla Creamy White

British:

This is as British as chocolate can be bearing in mind cocoa is grown in the tropics – it is all handmade in England.

Made with Care:

Seed and Bean do not mix their cocoa beans, giving a much richer, smoother taste and all their chocolate is made in small batches – in the aforementioned England!

100% Ethical and Organic:

All the ingredients are Fairtrade and Soil Association approved.  This means that cocoa farmers get a fair deal. Furthermore the wrappers are recyclable and, in some cases their packaging is even biodegradable – it’s made from Eucalyptus leaves!

Award Winning:

Seed and Bean have won 5 “Great Taste Awards” for people who are passionate about the quality of the food they produce.

Secret message on the back of the wrapper:


Seed and Bean chocolate comes in 32g mini bars, 85g bars and exciting looking hampers and is stocked in Wholefoods and Planet Organic as well as a range of farm shops and delis around the UK and Europe.  It is also available from: www.seedandbean.co.uk

Guess what!  I just had to try just a little of each chocolate whilst writing this just to double check – assiduous or what!


Do Yourself a Favour ~ Learn to Cook!

I've been eating very well recently or, more accurately, I've been eating very well for years and years and years and it’s all thanks to my Mummy!

When I was little I had no interest in food or cooking so never bothered to learn anything from her. Then I got engaged and had real asleep-at-night nightmares of my new husband starving to death as I couldn't feed him. Mummy bought me an "Supercook ~ an Encyclopedia of World Cooking" which was published in 112 parts. I read it on the way to work and very rapidly became hooked. 

Supercook magazine

Once married Ray (that’s his name – we’re divorced but I’m still glad I didn't starve him to death!) and I made a rule that once a week we had a meal entirely made of things or dishes we had never tried before. This was in the 70s and all sorts of interesting ingredients were being “discovered”– aubergines, avocados, chilli peppers and so on – and I loved experimenting. This quickly led to us selling our house and buying a rundown hotel in Cornwall in partnership with my sister.  We opened a restaurant, and then another one and that’s how my cooking career started. Well done Mummy!

So I can cook and it has not only given me a wonderful career all over the world, because it is something you can do anywhere, but it also means that I can cook whatever I fancy, often at the drop of a proverbial hat, out of leftovers.

As an example here are details of my last few meals. I’m not showing off, the point I am trying to make (probably not to readers of this blog though!) is that cooking is easy and can really make life better!


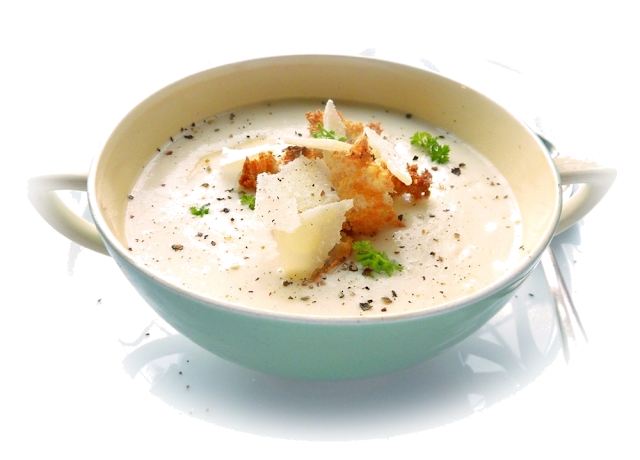
Roasted Garlic & Parmesan Soup

Serves 1

I had an ulterior motive for making this; I have just finished writing the third book in my "Genius Recipes” series, which is Soup: (almost) the Only Recipe You'll Ever Need and it needed a final photo before uploading it to kindle. 

1 small onion – thinly sliced
½ tbsp olive oil
1 medium floury potato – peeled and thinly sliced
about 250ml chicken or vegetable stock
2 – 3 cloves of roasted garlic
1 tbsp grated Parmesan + a bit for garnishing
30ml double cream

~   Heat the oil, stir in the onions, cover directly with a piece of foil or greaseproof or a butter paper, put the lid on the pan, turn the heat right down and cook gently till utterly tender.
~   Add the potato and just cover with stock, put on the lid and simmer till very tender.
~   Squeeze the soft roasted garlic from its skins into the soup and purée until smooth.
~   Return to the heat and stir in the cream and Parmesan.
~   Bring to
a simmer, taste and adjust seasoning again.
~  
Serve hot with croutons and more Parmesan.

roasted-garlic-and-parmesan-soup

Peppered Steak Salad


We often buy a fillet steak off-cut or two from the bargain bit of Tesco. The piece I used for this and the stir fry below (I divided it in two) cost £2.21 so not very extravagant.  This salad has been a menu favourite of mine for many years and was one of those dishes that, once tasted, regulars would order again even it wasn't on the menu that day! For Peppered Steak Salad recipe see here. 

peppered-steak-salad

Beef & Cashew Stir Fry


I marinated the second half of the steak in a mixture of Thai Sweet Chilli Sauce (a store cupboard staple) and Soy Sauce (another one!) and stir fried it together with vegies and cashews.

alfredo-sauce


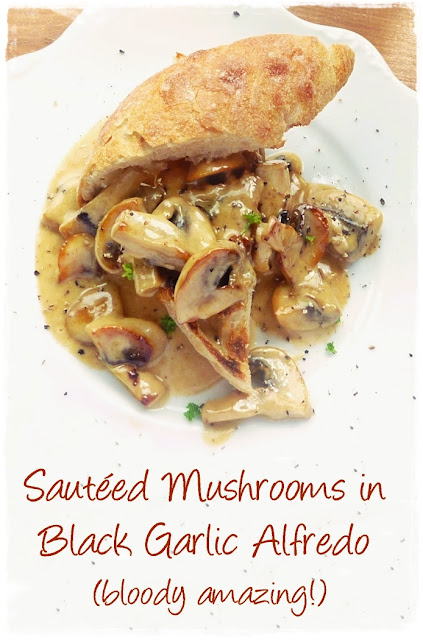
Mushrooms in Black Garlic Alfredo


Such a gorgeous mix of flavours. I've written about this before, see here.

This time I used 1½ mushrooms (as I only had 3 and this way I can eat this again!) and a splash of Whipped Cream which cost 16p for 300ml because it was at the end of its tether! It is now 6 days out of date and perfectly fine. I suppose this whole meal together with the toasted ciabatta can’t have cost me more than 50p.


Baked Sweet Potato Fries


I do like to keep either a sweet potato or a butternut squash around the place; they are delicious, versatile and keep very well.  Salmon for dinner last night so I decided to have the leftovers for lunch today and to try, for the first time making sweet potato fries in the oven. Easy peasy as it turns out – also quite fast so I recommend this.

~   Heat the oven to 425ºF/220ºC/200ºC fan/gas 7.
~   Put a baking tray in the oven.
~   Peel a sweet potato per person and cut into chips.
~   Toss them with a drizzle of olive oil and some seasoning; salt and pepper plus cayenne if you fancy it.
~   When the oven is hot spread the sweet potato chips on the hot tray with space around each chip. If you need more space heat another tray.
~   Bake for about 20-25 minutes depending on how thick they are. They are ready when golden and crisp and tender.

sweet-potato-fried

I wish people would realise that it’s not difficult to eat food you love every day of your life without spending much time or money. What a boon!  

I have cooked professionally for so long and really wish I could pass on what I know which is why the I blog and write cookbooks.  

Incidentally I do feed my real man too but his eating requirements are somewhat different to mine, he eats like this …

man-food