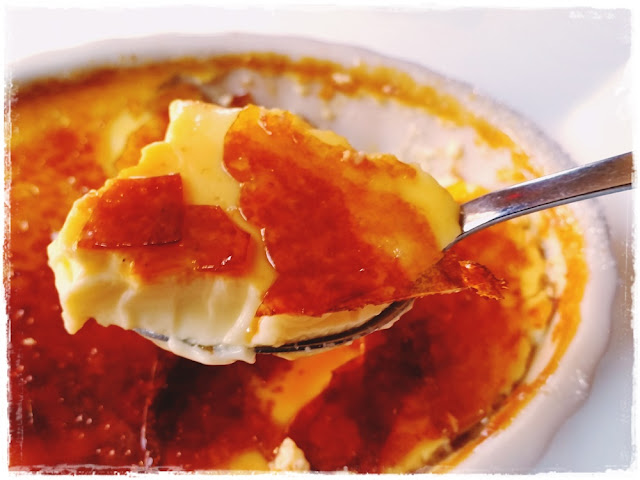
For ages now I’ve been craving a crème brulée. Not having a blow torch I have just gone on craving - but enough is enough, I decided to have one (or several) anyway.
But firstly ...
Classic Crème Brulée
You’ll need four ramekins, ceramic dishes, egg-dishes-with-ears or even into one large dish plus
a roasting pan, or other deep ovenproof dish, to make this.
300ml double cream
2 tablespoons caster sugar
1 vanilla pod (or other vanillary item – see below)
1 whole egg and 3 yolks
2 tablespoons caster sugar
1 vanilla pod (or other vanillary item – see below)
1 whole egg and 3 yolks
~ Preheat oven to 150ºC/300°F/130ºC fan/gas 2.
~ Cut the vanilla pod in half lengthways.
~ Put the cream and sugar into a small pan and put over medium heat stirring till the sugar has dissolved.
~ Add the vanilla pod halves and then bring almost to the boil, but not quite.
~ Set it aside to cool for a few minutes.
~ Remove the vanilla pods and strain the cream into a jug.
~ Scrape the tiny blacks seeds out of the vanilla pod into the cream.
~ Whisk together the yolks and whole egg and then gradually whisk in the hot-ish cream.
~ Divide the custard between your chosen dishes.
~ Bring a kettle of water to the boil
~ Put the roasting pan into the oven.
~ Gently and steadily place the dishes of cream mixture in the ovenproof dish.
~ Very carefully pour the hot water into the large dish to a depth of about 1.5 cm up the sides of the ramekins or similar.
~ Cook for about 20 minutes till just set, remove from the oven and from the hot water and set aside to cool.
~ Chill till needed, do not serve warm.
If you don’t have a vanilla pod add a couple of drips of vanilla extract (NOT artificial essence) or a little vanilla paste – see here for more about vanilla.
~ Cut the vanilla pod in half lengthways.
~ Put the cream and sugar into a small pan and put over medium heat stirring till the sugar has dissolved.
~ Add the vanilla pod halves and then bring almost to the boil, but not quite.
~ Set it aside to cool for a few minutes.
~ Remove the vanilla pods and strain the cream into a jug.
~ Scrape the tiny blacks seeds out of the vanilla pod into the cream.
~ Whisk together the yolks and whole egg and then gradually whisk in the hot-ish cream.
~ Divide the custard between your chosen dishes.
~ Bring a kettle of water to the boil
~ Put the roasting pan into the oven.
~ Gently and steadily place the dishes of cream mixture in the ovenproof dish.
~ Very carefully pour the hot water into the large dish to a depth of about 1.5 cm up the sides of the ramekins or similar.
~ Cook for about 20 minutes till just set, remove from the oven and from the hot water and set aside to cool.
~ Chill till needed, do not serve warm.
Other “Vanillary Items”
If you don’t have a vanilla pod add a couple of drips of vanilla extract (NOT artificial essence) or a little vanilla paste – see here for more about vanilla.
Whilst the custards are cooking wash
the vanilla pods under cold water, wipe well and leave somewhere warm such as
the airing cupboard to dry out completely.
Pop them into your sugar container and leave them there to make vanilla
sugar or they are also good in a bottle of rum!
Caramel Topping
The normal, and quite frankly, the best way to finish off a crème brulée is like this ...
Caramel Topping
The normal, and quite frankly, the best way to finish off a crème brulée is like this ...
~ Sprinkle the top of the custard with sugar, caster sugar (superfine) is best as it melts quickly but other sugars work well too.~ Make sure the top of the custard in completely covered, then tip off any excess sugar.
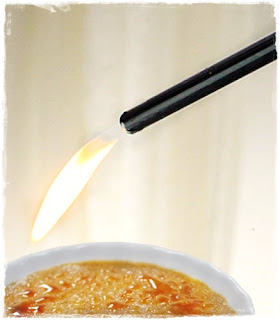
~ Light your blowtorch and run the flame back and forth over the surface of the sugar till is has melted and caramelised to a deep golden brown.
~ Light your blowtorch and run the flame back and forth over the surface of the sugar till is has melted and caramelised to a deep golden brown.
Crème Brulée without a Blow Torch
Not having a blowtorch and dearly loving crème brulée I put my mind to the problem and decided to try five ways I might be able to enjoy this delectable dessert without the aforementioned equipment.
The first way is the best but the fifth is differently delicious so do have a look at it.
My Five Crème Brulée Methods and Findings
Method No. 1
Pop the dish under a hot grill. The grill must, however, be very fast as otherwise you risk heating and overcooking the cool creamy custard, preheat fully before starting. Watch carefully till the sugar has melted and caramelised to a deep golden brown. Remove immediately.
For the next two methods you need to know ...
How to Make Caramel
100g caster sugar
60ml water
~ In a pan over low heat stir together the sugar and the water till the sugar is dissolved and then bring to a boil. Don’t stir once it boils but swirl about a bit when it begins turning colour.
~ Boil to a deep golden brown watching carefully.
~ Use immediately it
reaches the right colour being very careful because it is very hot and burny. Useful Tips When Making Caramel
~ Use a wooden spoon so that it neither gets too hot
nor melts.
~ Use a capacious pan so that the caramel has plenty of room.
~ If possible don’t use a non-stick pan as they are too dark to see the colour of the caramel.
~ Equip yourself with a good heatproof cloth.
~ Put any additions immediately to hand beside the stove.
~ Never touch anything alive with hot caramel!
Method No. 2
Pour the caramel on top of the chilled custard. I was worried this would damage the custard and it did! The custard closest to the caramel was grainy rather than creamy. Not recommended.
Drizzle a pretty caramel shape and serve with or on the custard – maybe even sprinkle a little crunchy sea salt onto the caramel too! This was fiddly to do and didn’t give quite a high enough caramel to custard ration, so I added a caramel shape as a garnish to method no. 3 below.
Method No. 4
For this you need to make the caramel half an hour or so before using it, depending on your location, to let it fully harden.
Pour the caramel onto a greased baking tray. When cold and solid crush it and sprinkle on the custard. My first try it looked pretty but was a bit too much caramel to cope with; made our teeth stick together. I tried again with finely crushed caramel and this was much nicer.
Crushing
is achieved either by using a sturdy pestle in a rough grained mortar or by
wrapping the caramel in a clean tea towel and bashing the bejesus out of it with a hammer or
something similar.
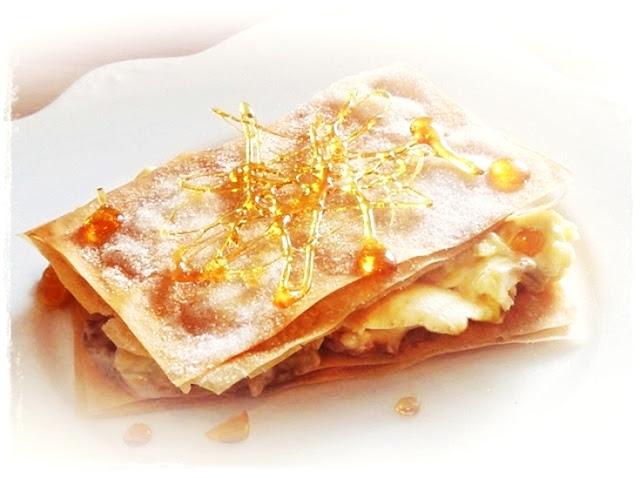
5. Crème Brulée Napoleon
This was an idea I came up with when working in a very small, very busy,
very, very hot kitchen in the Caribbean.
The wait staff always served the desserts themselves from a desserts
fridge in their own area. Sugaring and
caramelising the brulées was fraught and time consuming especially as it was such a
popular dessert so I came up with a cunning plan.
I prepared crisp sugary
phyllo wafers which the girls (and one boy) served sandwiched with the chilled baked custard.
It worked very well resulting in unfrazzled nerves, happy customers and speeded
up service.
3 sheets phyllo
pastry
60g butter – melted
about 85g caster sugar – or, even better, the vanilla sugar mentioned above
60g butter – melted
about 85g caster sugar – or, even better, the vanilla sugar mentioned above
~ Preheat the oven to 180ºC/350°F/160ºC
fan/gas 4.
~ Brush a little butter on ONE baking tray.
~ Lay the phyllo pastry sheets, in a stack, on a cutting board and firstly cut in half lengthways and then across ways into four to produce eight squares or oblongs (lovely word).
~ Lay the first 8 on the greased baking tray, a little apart, brush with butter and sprinkle with sugar.
~ Repeat twice so that you have 8 sugary, buttery stacks.
~ Bake for 10-15 minutes till crisp and golden.
~ Transfer to a rack to cool.
~ Serve sandwiched with cold baked custard.
The pastry is beautifully fragile, breaking into crunchy flakes that are a perfect contrast to
the smooth creaminess of the custard. I very seriously recommend this method.
Incidentally I have heard of people melting their caramel with a gas lighter and think it might well work. I haven't got such a thing now but for all my professional life, for some reason, it has been known in my kitchens as a clicky bastard!!


2 comments:
Hey! I just wanted to leave a comment to tell you how AWESOME your blog is. For real! Loved the puff pastry scrap ideas, they saved my life.
Greetings from Chile!
Thank you so much Pancho, glad to be of help!
Post a Comment